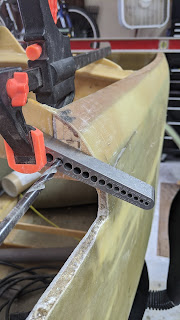
Yay!...I get to add the first flying surface to the fuselage. I guess technically it would be the second since I've already fabricated the main gear fairings, which are also airfoils, but this one is more exciting.
Editorial Note: I know some people following this don't know one part from the next and it's sometimes hard to tell what's going on in my pictures. So, going forward, I'll try to include a small pic like the one to the right that highlights the part I'm talking about. Hope that helps.
The canard, like the wings, are designed to be removable. This is so that you can get to areas under it for maintenance, remove it for any needed work on the canard itself, or transport the airplane. It's basically held on by 2 bolts. In my case 4, but technically the upper two are really just alignment pins. If you're unfamiliar with airplanes you're probably thinking...really! just two bolts? Yes, and you'd be surprised how few bolts are holding the wings on most all small aircraft. In aviation slang, these are typically called the "Jesus" bolts of the airplane. You can guess why.
It must be aligned
 |
| Drilling 5/16" hold through the longeron doubler. Note the drill block to help keep things straight. |
In my case, I'm implementing a common deviation which replaces the permanent pin with a removable bolt that runs all the way through the doubler. Basic directions for this modification can be found in the Cozy FAQs under chapter 12.
Basically, a bolt will come from behind F28 forward through a tube and screw into a nut plate attached to the alignment pin tabs fab'd onto the canard. The advantage of this is mostly for maintenance. When you remove the canard using the plans method, you have to pull it forward and away from the pins before it can be lifted out. Some builders have reported this to be a bit tedious. Using the bolts makes it possible to just remove the bolts (pins) all together and then the canard will come straight up, simplifying it's removal.
 |
| Tube before cutting to size showing it is perpendicular to the bulkhead |
 |
| Alignment tube from the rear temporarily installed for fit. |
It took me longer to write this than to actually do it. The only thing really left in this modification is to flox on a nut plate on the forward side of the alignment tabs once they are built. Now we have to establish an accurate mounting location for the canard.
Onward!
No comments:
Post a Comment